Manage Data Access Rights
Data access rights were developed to distribute complex and differentiated rights to survey data. We use the group divisions that were used in the survey for this purpose. For anonymity reasons, very small teams are often combined in surveys to ensure the anonymity of participants. With data access rights, you can precisely control which administrators and users have access to which data levels.
Important: You need admin rights for this function.
Prerequisites
- You have administrator rights in the system
- The survey data is already available and has group divisions
- You know the organizational structure and the hierarchy of data rights
Step-by-Step: Manage Data Access Rights
1) Open User Page via Dropdown Menu
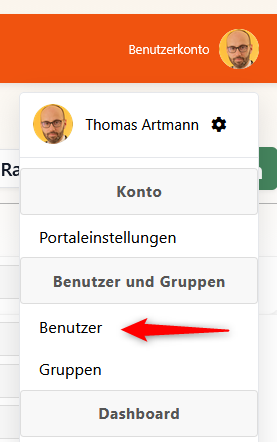
- Open the dropdown menu at your user account (usually top right in the system)
- Select the "Users" option to go to the user page
2) Overview of Data Access Rights
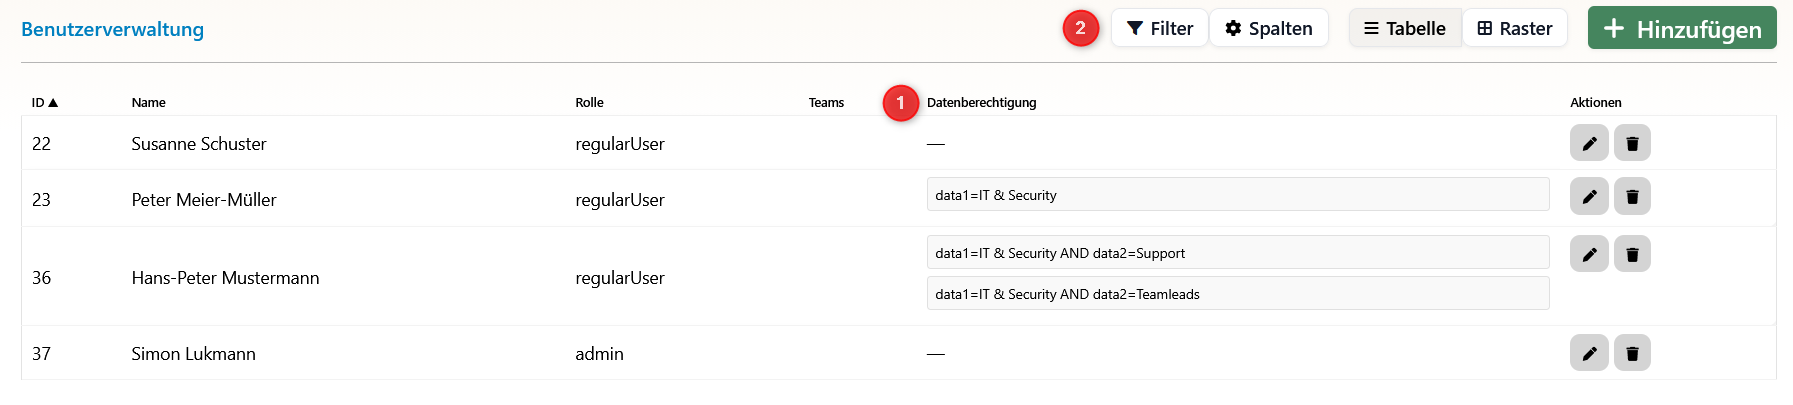
- (1) New Column: The column shows the complete paths to the authorized data elements. Here you can see at a glance which data accesses are configured for each user.
- (2) Filter Tool: We need the filter tool to check permissions clearly. With this tool, you can quickly search for specific permissions or users and ensure the clarity of rights assignment.
3) Open User – "Data Authorization" Tab
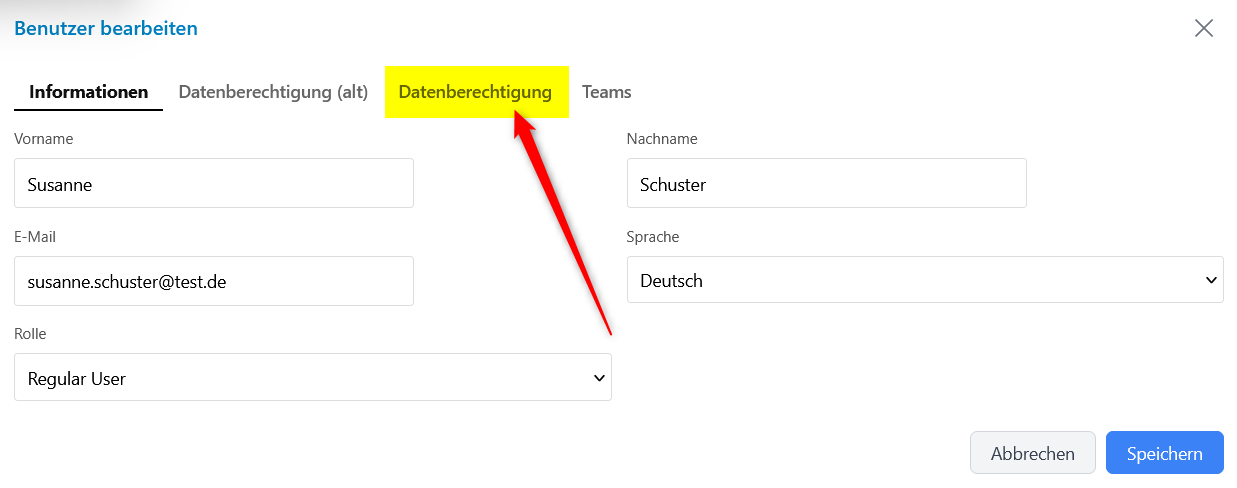
- Open a user from the list to display their details
- In the user profile, you will find the new "Data Authorization" tab
- Click on this tab to manage the data rights for this user
4) Hierarchy of Data Rights
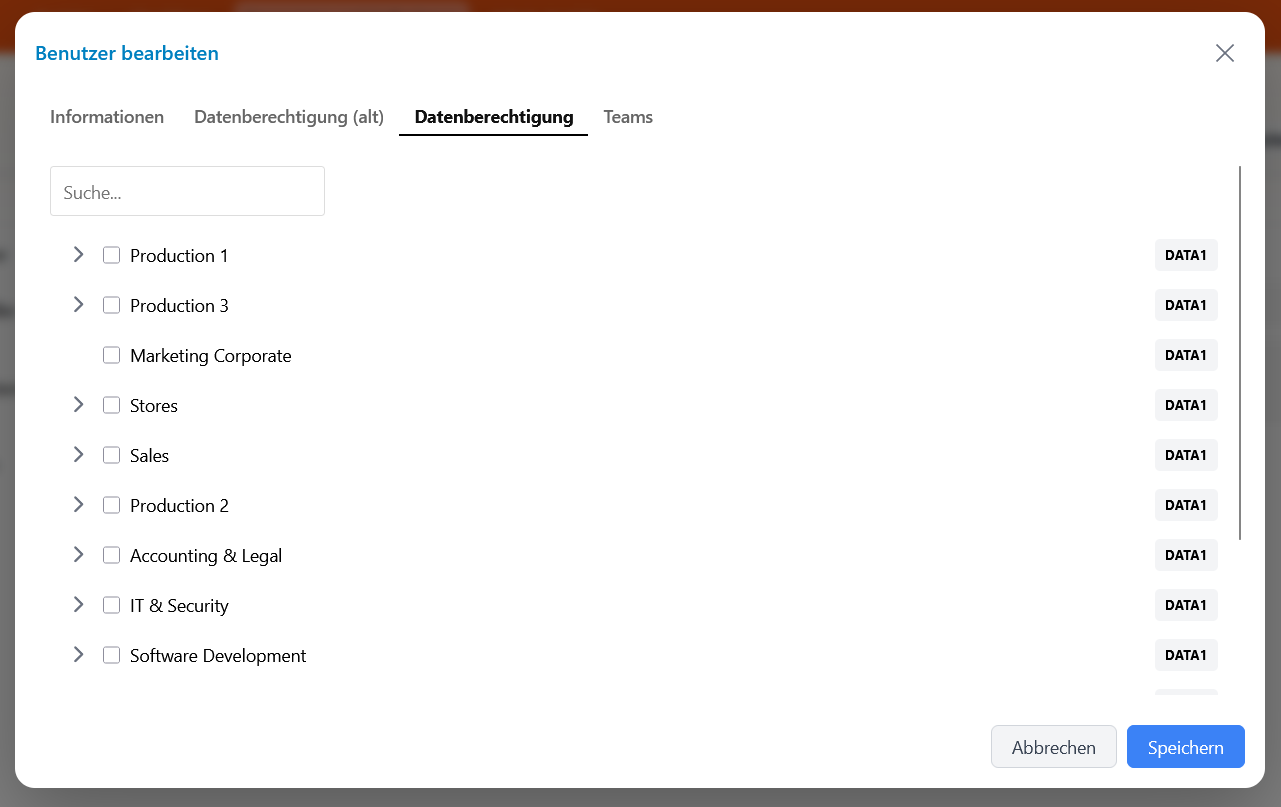
- Here the hierarchy of data rights is shown
- The structure shows the different levels of organizational data, starting from the top level (e.g., Data1) down to the specific subunits
- The tree structure makes it possible to understand the relationships between the different data levels
5) Grant Rights at Top Level
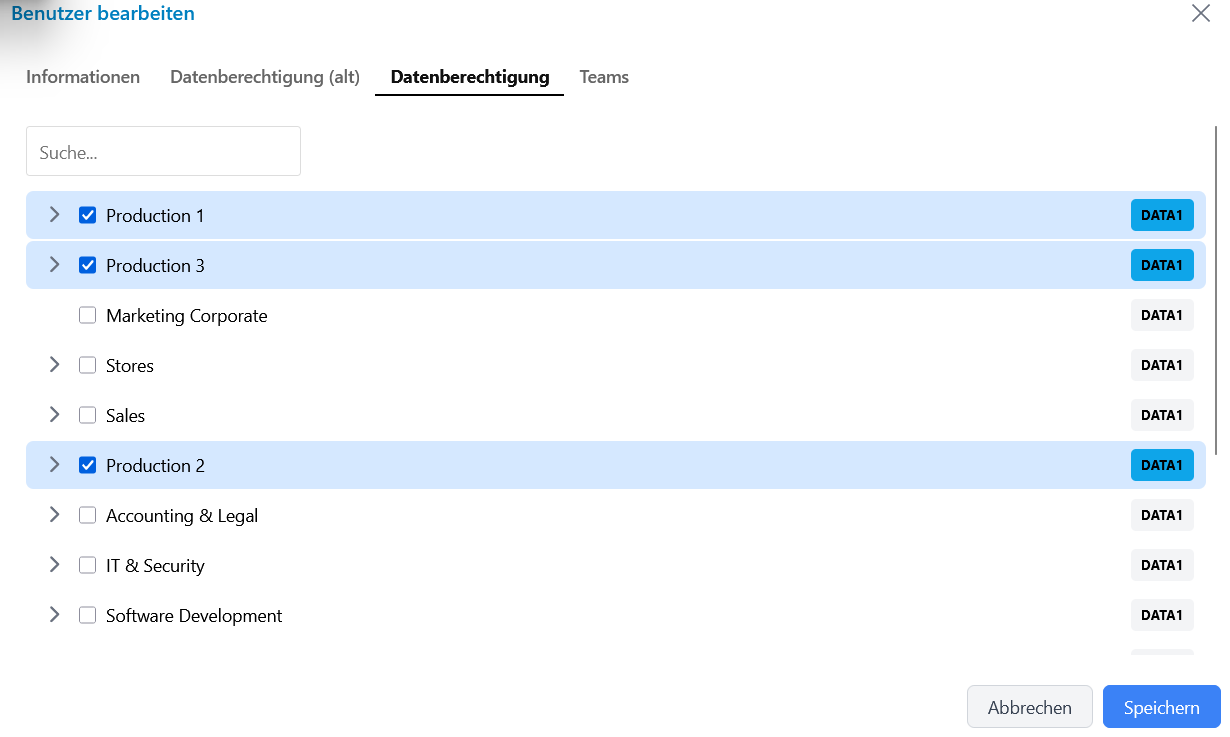
- You can select elements at the top level (e.g., Data1)
- If a user receives rights at this top level, they automatically have access to this and all subordinate elements
- This is the simplest method to grant comprehensive permissions
- Using the search field, you can quickly narrow down your results list so that you can quickly access the organizational units you are looking for
6) Selective Rights Assignment
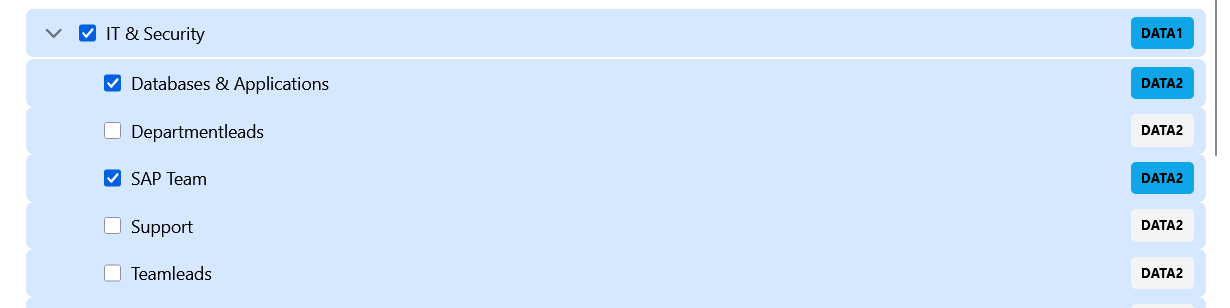
- You can also selectively choose individual elements, e.g., two specific departments at Data2
- If only certain departments are selected, the user only has access to these two departments, but not to other data (e.g., not to the data of the parent level, in this example "IT & Security")
- Important: A lower-level access restricts higher-level accesses. This means that if you grant specific rights at a lower level, the more comprehensive rights at higher levels are automatically restricted.
7) Path String of Permissions

- This is what the string looks like that defines the rights for the two selected departments
- The correct, complete path is always saved, which describes the exact position in the data hierarchy
- This string enables precise and traceable rights assignment
8) Use Filter Function
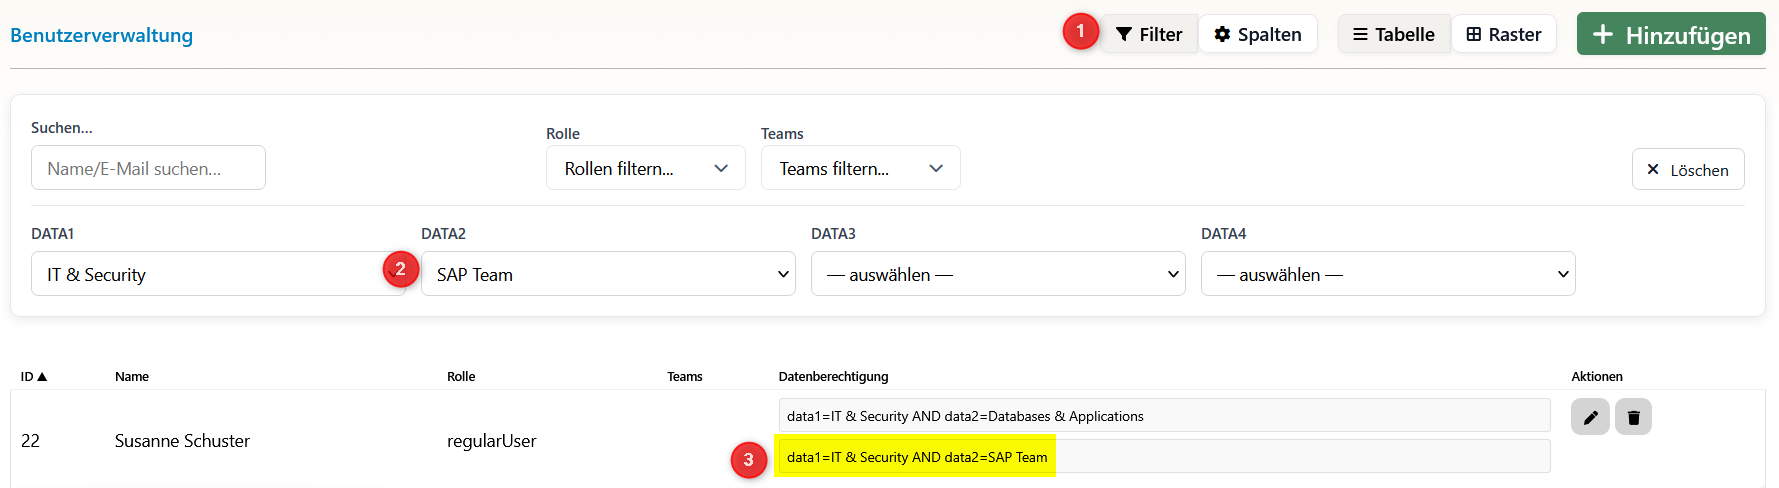
- This is how the filter function works at (1) (the new column with the complete paths)
- Select at (2) the organizational unit whose access you want to check
- You see all users who can access exactly this organizational unit in the reporting module
- This function is particularly useful for checking who has access to sensitive data areas
Important Notes
Hierarchy and Restrictions
- Top-Down Principle: Rights at the top level automatically include all subordinate elements
- Bottom-Up Restriction: Specific rights at lower levels restrict more comprehensive rights
- Path Accuracy: Each permission is saved with the complete path to ensure precise assignment
Fallback Protection
If the assigned elements are deselected again, {none} is saved as a string and automatically blocks access.